

How to turn drone photos into an orthophoto, point cloud and bare-earth surface (with or without ground control)
· 11 min read · by the Backsight team
A drone flight is only worth flying if the photos turn into something you can measure from: an orthophoto to draw over, a point cloud to inspect, a surface to take volumes and contours off. This is the whole path, written out step by step, with a real flight: 78 photos from a DJI Matrice 350 at 2 cm ground sample, uploaded, processed and turned into an orthophoto, a point cloud, a bare-earth terrain model and a surface model, then drafted over in CAD. The video shows it happening; the text below is the version you can follow with a browser open beside it.
One thing to say up front, because it is the question we get most: you do not need ground control points to do this. A flight with no targets still processes, placed by the photos’ own GPS. Ground control is a choice you make when the job needs surveyed accuracy, and the walkthrough covers both paths.
What you get from a flight
Four products come out of one set of photos. They answer different questions, and it is worth knowing which one you are after before you fly.
- Orthophoto. A single georeferenced image of the site, every pixel looking straight down, delivered as a GeoTIFF. This is what you draw over: lot lines, curbs, building footprints, the extent of a stockpile.
- Point cloud. Millions of measured points in three dimensions, delivered as LAZ. Turn it, cut sections through it, classify the ground in it, build surfaces from it.
- Surface model (all features). A surface over everything the camera saw: ground, buildings, trees, vehicles. Right for a visual, for drape, and for the top of a stockpile.
- Terrain model (bare earth). A surface over the ground alone, with the vegetation and structures classified out. This is the one you contour, take cut and fill against, and compare with last month’s.
In the video these arrive at 6:38, and the last chapter at 9:48 shows all four going out as deliverables.
What you need before you start
- The photos, as the camera wrote them. JPEG straight off the card, with the GPS position each frame was taken at still in its header. Do not run them through an editor first; that strips the header and the flight loses its positions.
- A coordinate system for the job. In Canada that usually means a UTM zone or a provincial projection on NAD83(CSRS), and a vertical reference such as CGVD2013. The products come back on that grid. Backsight never guesses a datum and never substitutes one for another, so state it once at the start.
- A decision about ground control. Either the photos’ GPS places the model, or targets you surveyed do. The difference is accuracy, covered below.
- Overlap. The usual photogrammetry rules apply: around 75 percent forward and 65 percent side overlap, a consistent height, and no photos of the sky. The processor matches features between overlapping frames, and a gap in the overlap is a hole in the model.
The walkthrough
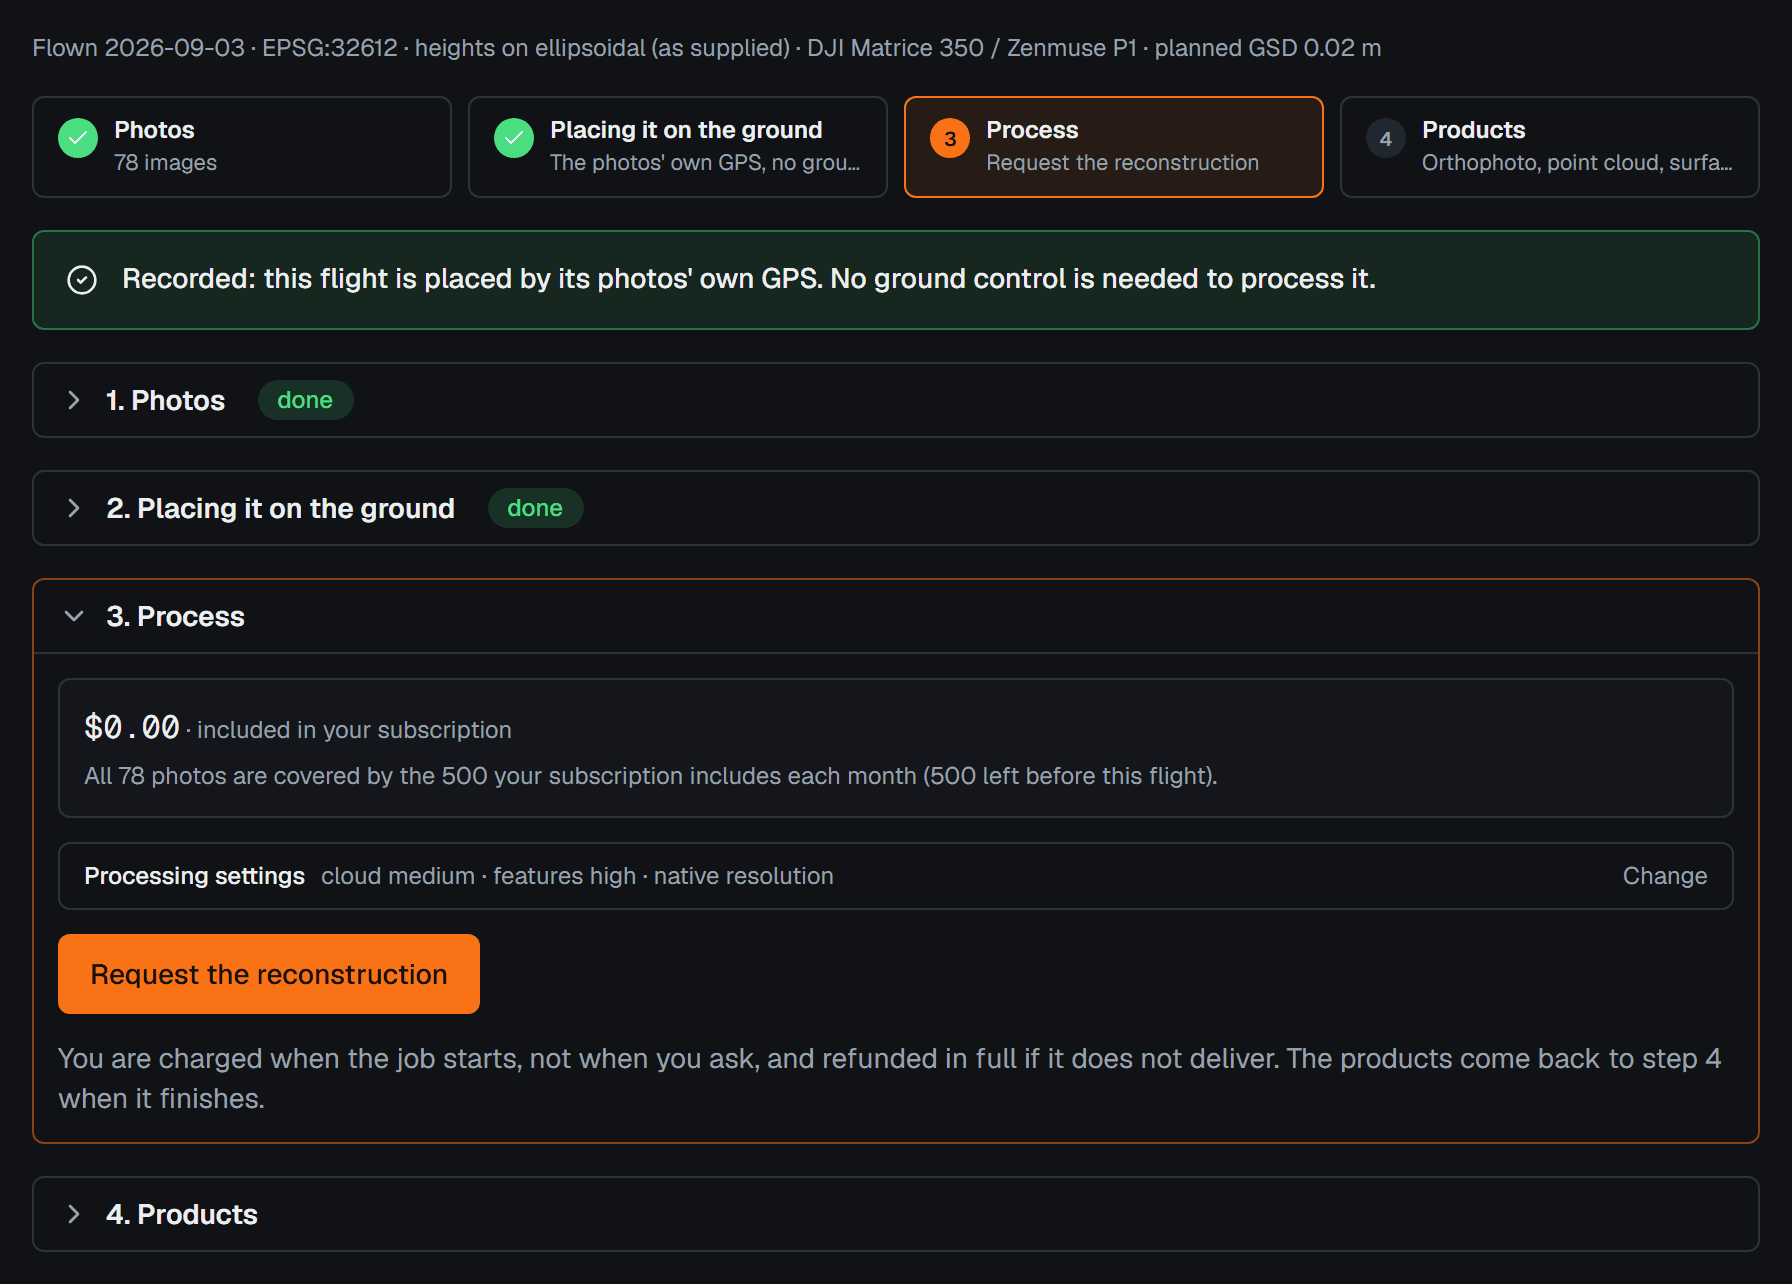
A mission in Backsight is four steps in the order the work happens, the ones in the picture at the top of this page. Each one says whether it is done, and the next opens as you go.
1. Record the flight
On the project’s Drone tab, New flight asks for a name, the day it was flown, the coordinate system and the vertical reference. Aircraft, sensor and planned ground sample are worth recording but never worth stopping for, so they sit behind an optional Details section. The video does this at 2:45.
2. Upload the photos
Choose the flight’s images and upload them. They go straight from your browser to storage, one at a time, with a progress bar for the frame in flight and one for the whole flight, because a few thousand photos takes minutes and a frozen page tells you nothing. As each frame goes up, Backsight reads its GPS position out of the header. Once the flight is in, the step marks itself done and the next one opens.
Frames are kept. A reconstruction can be run again later, finer or with control added, without flying the site twice. A frame already in the mission is never overwritten.
3. Say how the model is placed on the ground
This is the step people used to get stuck on, because ground control looked required. It is a choice between two cards, and either answer is recorded on the mission and stated on every product that comes out of it.
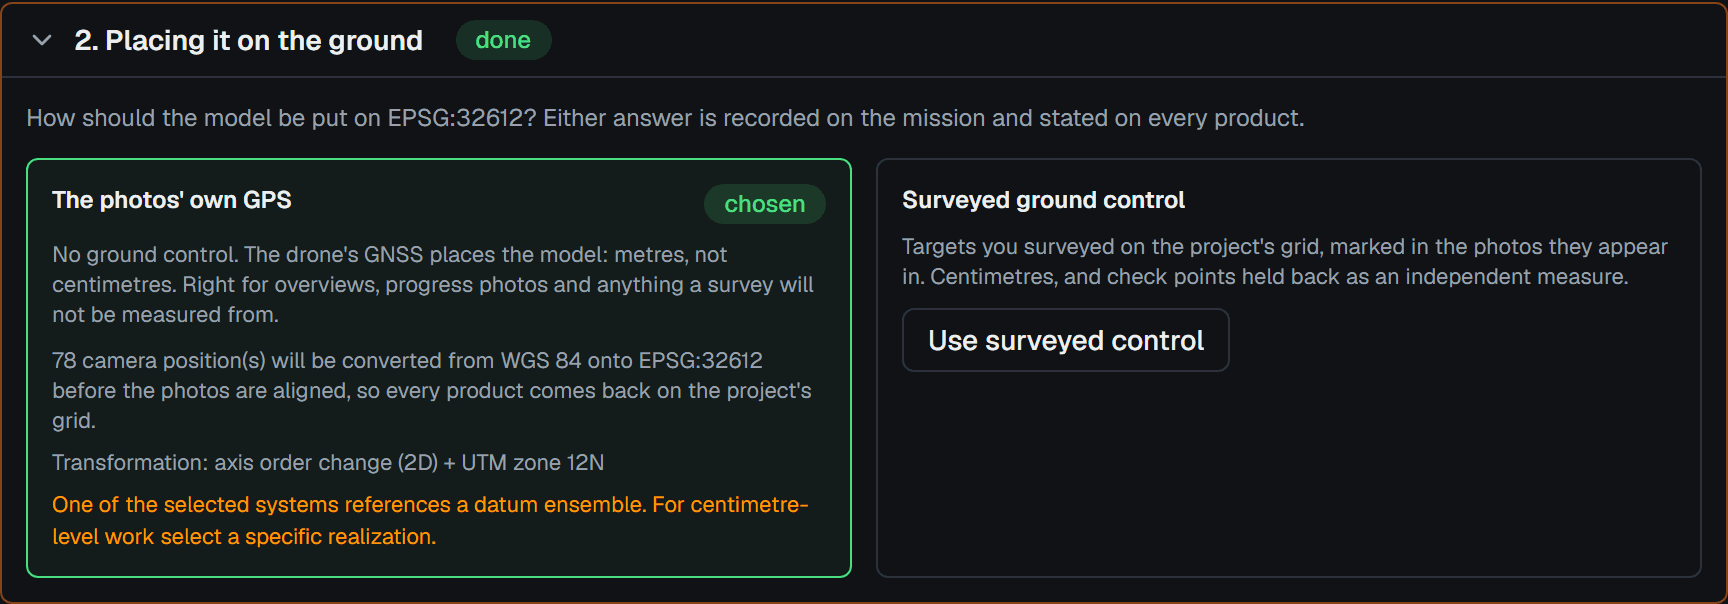
The photos’ own GPS. Click Continue without ground control and the mission is ready to process. The camera positions are converted from the WGS 84 the camera records onto the project’s grid before anything is aligned, so the products come back on the grid the job is drawn on rather than on whatever zone a processor would pick for itself. The transformation that did it is named on screen, with its stated accuracy, and a datum change that needs a grid file your organization has not installed is refused rather than approximated. The card tells you what to do about that: install the grid, use a UTM zone on WGS 84 for the mission, or accept an approximate conversion for the camera positions only, which is the one place Backsight allows one. That acceptance is recorded with your name and printed on every product.
Surveyed ground control. Click Use surveyed control and the points open under the cards. Type them, paste them, or pull them from a point dataset already in the project. Mark each one as control or as a check point; check points are held back from the adjustment so they stay an independent measure of the result. Then, below the points, mark each control target in the frames it appears in. Three targets, each seen in three frames, is the minimum that constrains a model, and the step says plainly when the targets are ready and when they are not. The video walks this part at 3:11.
4. Process
The price is shown from the photos already uploaded, before you commit. Every seat includes 500 photos of processing a month, and this 78-photo flight cost $0.00. Past the included photos it is $0.04 CAD a photo, charged when the job starts and refunded in full if it does not deliver. A job can be stopped from the same card while it runs.
The settings sit behind one line that says what they are. Change them when you have a reason to:
- Orthophoto only. Skips the dense reconstruction. Several times faster, at the same per-photo rate, and you get the orthophoto and nothing else. Right for progress photos and something to draw over.
- Feature matching. How hard the processor looks for tie points between photos. Higher helps on low-texture ground: snow, fresh gravel, water.
- Point cloud density. The setting that decides whether a flight takes twenty minutes or two hours.
- Output resolution. The ground sample of the orthophoto and the elevation models. Native uses what the flight was planned at; finer than the flight captured adds pixels, not detail.
- Classify the ground, and build a terrain model from it. This is what turns the surface model into a bare-earth terrain model on the same run.
Every setting is recorded on the job, so any product can be traced back to how it was made. The video goes through them at 3:37.
The reconstruction runs on a machine rented for that one job and destroyed when it ends; your photos and the products are stored in Canada. Progress is live on the card: aligning, dense cloud, surface, orthophoto. At 4:57 you can watch one run.
5. Products
When the job delivers, the orthophoto, point cloud, surface model and terrain model are placed in the project through the same readers an import goes through, and listed on the mission with their format, ground sample, point count and size. Each carries a note on how it was put on the ground: surveyed control, or the photos’ GPS. Processed the flight in other software? Import the result and attach it here, so the mission still records where it came from.
Without ground control: when that is fine, and when it is not
With GPS-only placement the model is internally consistent and its scale is right; what is uncertain is where it sits in the world. Ordinary drone GPS puts that at a few metres. An aircraft with RTK does far better, but without check points you have no independent measure of it, and a number you cannot check is not a number you can sign.
- Fine: progress photos, site overviews, a base to sketch over, stockpile volumes where the pile is measured against its own toe, vegetation and drainage reconnaissance, anything where a metre of absolute position does not change the answer.
- Not fine: boundary, design tie-in, as-builts against a plan, quantities measured against a surveyed surface, anything a client will scale from. Survey targets, hold checks back, and read the check residuals when the products come back.
You can start on GPS and add control later. Survey the targets, choose Use surveyed control, mark them, and run the reconstruction again; the frames are already there.
What to do with the products
- Draw over the orthophoto. It shows on the Draw tab under your linework at its true position; at 7:34 the video draws polylines straight over it. Clip it to a boundary if you only want part of it.
- Contour the terrain model. Under Surfaces, set the interval, the base elevation and how often a major line falls, style each class, and generate contours as real entities on their own layers.
- Take volumes. To a datum, or between two surfaces, with the method stated on the record.
- Send it out. The Deliverables tab hands out the GeoTIFF orthophoto, the LAZ cloud, the DTM and DSM, and your drawing as DXF or LandXML, with the coordinate system and vertical reference stated on each.
Try it on a flight you have already processed
The honest test is a job you already delivered. Upload the same photos, choose the same placement you used, and compare the orthophoto and the terrain model against what you issued. Backsight is $99 CAD per seat per month with every module included, and the first 500 photos each month are part of that. The pricing page has the rest, and the help centre has the same walkthrough in reference form.
Questions people ask
- Do I need ground control points for drone mapping?
- No. A flight processes on the photos' own GPS positions, which Backsight converts onto your project's grid before alignment. Ground control is a choice you make when the job needs surveyed accuracy: survey targets, mark them in the photos they appear in, and hold check points back so you have an independent measure of the result.
- What accuracy do I get from drone GPS alone?
- The model is internally consistent and correctly scaled; what is uncertain is its absolute position, which for ordinary drone GPS is a few metres. An RTK aircraft does far better, but without check points there is no independent measure of it. Anything a client will scale from should be placed on surveyed control.
- How many photos do I need, and how much overlap?
- Around 75 percent forward and 65 percent side overlap at a consistent height, with no photos of the sky. The processor matches features between overlapping frames, so a gap in the overlap is a hole in the model. A single job can hold up to 3,500 photos.
- What does drone processing cost in Backsight?
- Every seat includes 500 photos of processing a month; past that it is $0.04 CAD a photo, charged when the job starts and refunded in full if it does not deliver. The 78-photo flight in the video cost $0.00.
- What is the difference between a DSM and a DTM?
- A DSM, the surface model, covers everything the camera saw: ground, buildings, trees and vehicles. A DTM, the terrain model, covers the bare earth alone, with vegetation and structures classified out. Contour and take volumes from the terrain model; drape and visualise with the surface model.
- What formats do the products come in?
- The orthophoto, surface model and terrain model are GeoTIFFs, the point cloud is LAZ, and your drawing over them exports as DXF or LandXML. Each states the coordinate system and vertical reference it is on.