
Drawing: tools, the command line and snaps
How to draw, how to be quick about it, and how to make things land exactly where you mean.
6 min read
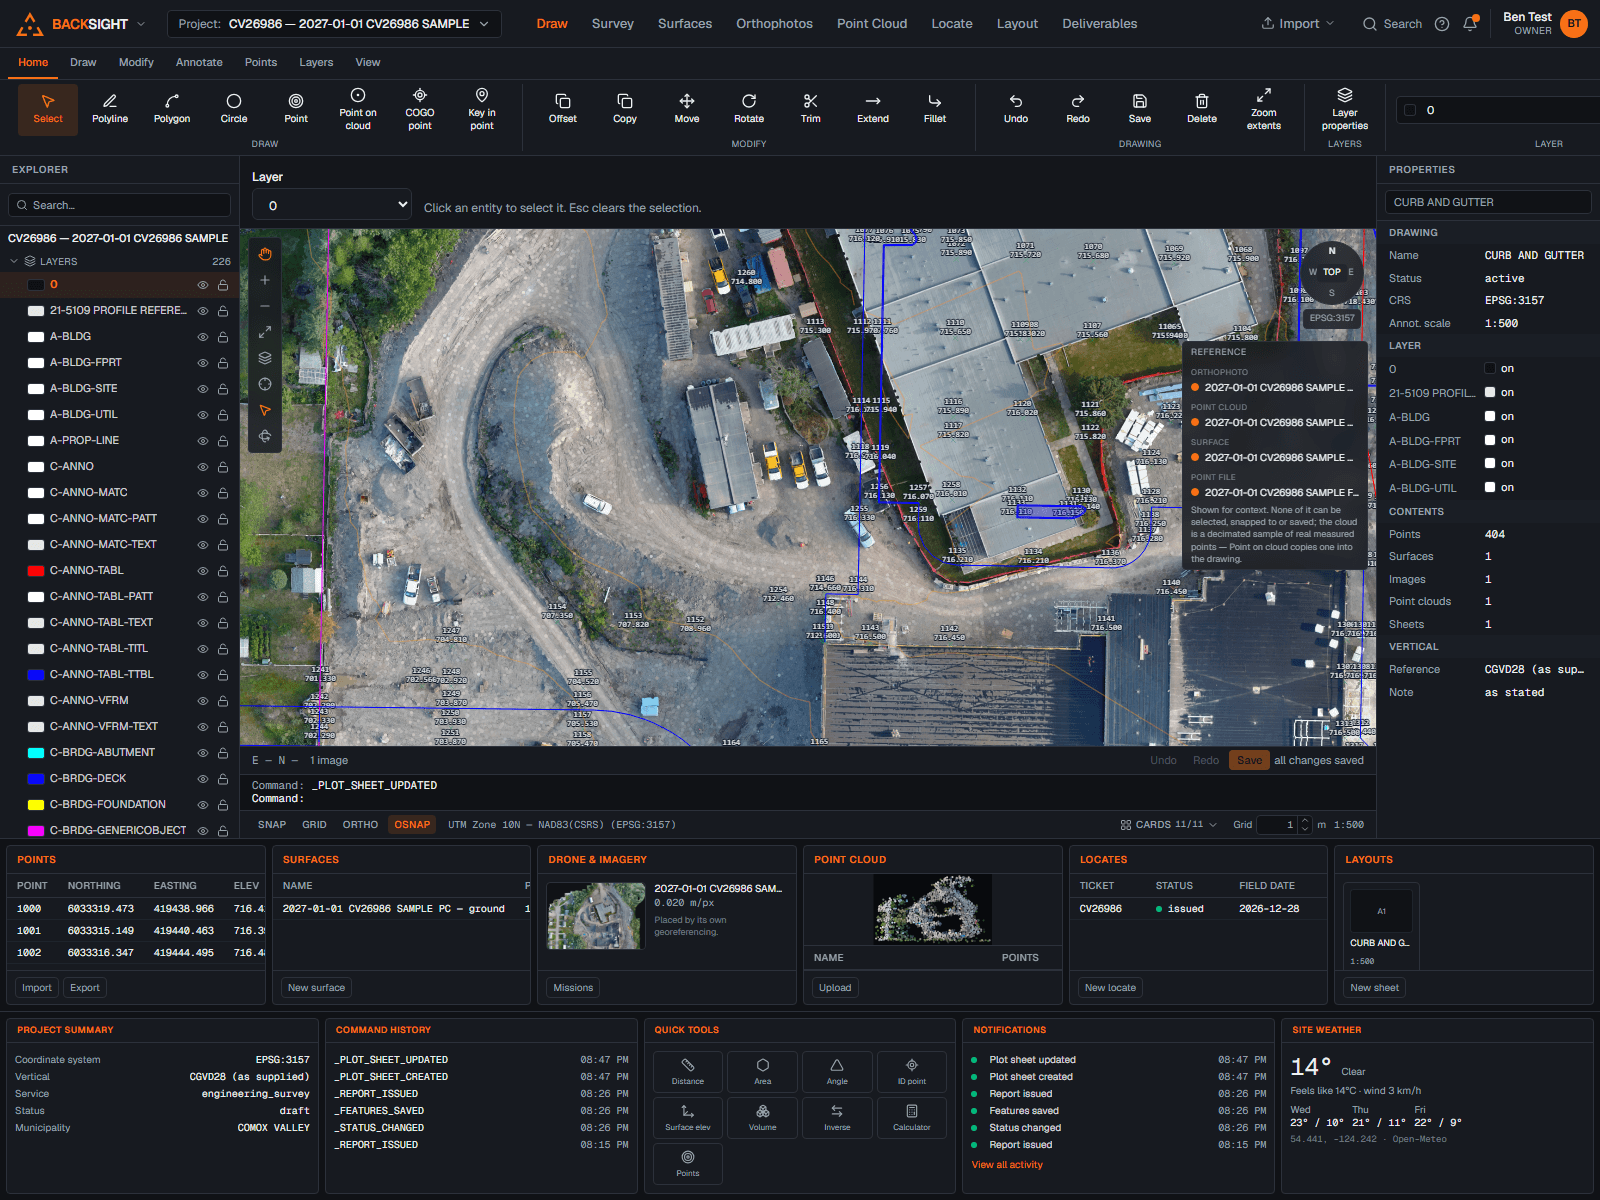
Making a drawing
A project starts with no drawing, and it can hold as many as the job needs, a plan of survey, a locate sketch base, a design check, each on its own name.
- Open the Backsight menu (the wordmark, top left) and choose New drawing. The same link is in the Explorer under Drawings, and on Project overview → Drawings.
- Give it a name. Two drawings in one project cannot share a name.
- Keep the project's coordinate system, which is offered first. Change it only when this drawing is genuinely on a different grid.
- Create. The drawing opens on the Draw tab.
Note
Surfaces, orthophotos, plot sheets, alignments and stakeout lists belong to one drawing, not to the project. A second drawing starts empty: attach imagery and build surfaces in it separately. The Draw tab opens the newest drawing unless a link named one; the Drawing switch above the canvas and the Explorer move between them.
Drawing something
- Choose a tool from the Draw ribbon, or type its alias and press Enter.
- Click to place each vertex.
- Double-click, or press Enter, to finish.
- Esc cancels whatever is in progress without leaving half a line behind.
- Backspace removes the last vertex while you are still drawing.
Placing points
Point places a shot where you click and numbers it for you, which is what you want for a run of them. Point details is the same click when the shot has a number, a height and a code of its own: pick the spot, then fill in the point number, elevation and description before it is placed.
Leave the elevation blank
Point details reads the height from the surface under your pick. Outside the surface it places the point with no elevation and says so, nothing is extrapolated past a surface's edge.
Several surfaces: say which
When a drawing has more than one surface, the first tool that reads a height, Point, Point details, Points on surface, Slope label, asks which surface to read from, once. The status bar names the surface behind every Z it shows, and its Z from list changes the choice at any time.
Both snap. A click on existing geometry takes its exact coordinates, and a description that matches a description key draws the point with that symbol.
Points join the survey when you save
A point placed on the canvas becomes a real survey point in the project's “Drawn points” file, at the moment you save the drawing, and it takes its point number then. Undo it, delete it or close without saving and nothing is written, so the point file holds exactly the points the drawing kept.
The command line
Type a letter anywhere on the canvas and the command line takes focus. It takes the aliases your fingers already know, and it answers in words, what it did, or why it would not.
| Type | Command |
|---|---|
| L | Line |
| PL | Polyline |
| C | Circle by dragging |
| CR | Circle by typed radius or diameter |
| LB | Line by length and bearing |
| PD | Point details, picked, with number, elevation and description |
| O | Offset |
| CO | Copy |
| M | Move |
| TR / EX | Trim / Extend |
| DI | Distance between two points |
| AA | Area of picked corners |
| LI | List what is selected |
| Z | Zoom |
| U | Undo |
Enter repeats
Pressing Enter on an empty command line runs your last command again. Offsetting twenty lines is one keystroke each after the first.
Making things land exactly
- OSNAP, snap to endpoints, midpoints, centres, intersections, perpendiculars and existing points. Right-click the OSNAP chip to choose the modes; Apparent intersection (where two lines would meet if extended) is there too, off unless you want it.
- SNAP, snap to the grid. The crosshair jumps to the grid point and the readout says “grid”, so what a click will place is never a guess.
- ORTHO, constrain to right angles.
- GRID, show the grid; it steps up as you zoom out so it never becomes a grey wash.
The toggles are on the status bar along the bottom. They are per-drawing and they stay as you left them.
Changing what you have drawn
- Click to select, then edit in the properties card that opens beside it on the canvas.
- Right-click any entity for the actions that apply to it.
- Drag a selected entity to move it; grips on the vertices reshape it.
- Match properties (MA) copies layer, colour, text height and point style onto another selection.
- Ctrl+Z undoes, and every command says how to reverse what it just did.
Read next
- Command referenceEvery command, its alias, and what it does: the list to keep open while you learn.
- LayersMake them, set their defaults, and control what is visible, locked or plotted.
- Linetypes and line stylesFifty linetypes named in plain words, how to apply them, and how to change a line's style without touching its layer.
Something here wrong or missing? Tell us and we will fix it.